16 Easy Steps to Start a Blog quickly with Bluehost
 This page will help to guide you through the sign-up process for a Bluehost shared hosting account, but why would you want to use Bluehost?
Bluehost is a premium Shared Hosting Company who have been around for a long time, it really does feel like they have been around for ever. There is something to be said for a company that has lasted through a few down turns in the Internet so they must be doing something right.
I’ve used them since I started dabbling on the Internet and have always thought they have over delivered on their service and product offerings. But you can decide for yourself and take advantage of their ‘anytime money-back guarantee’ if you aren’t happy or decide this ‘Internet Thing’ isn’t right for you.
Step 1. – Getting Started
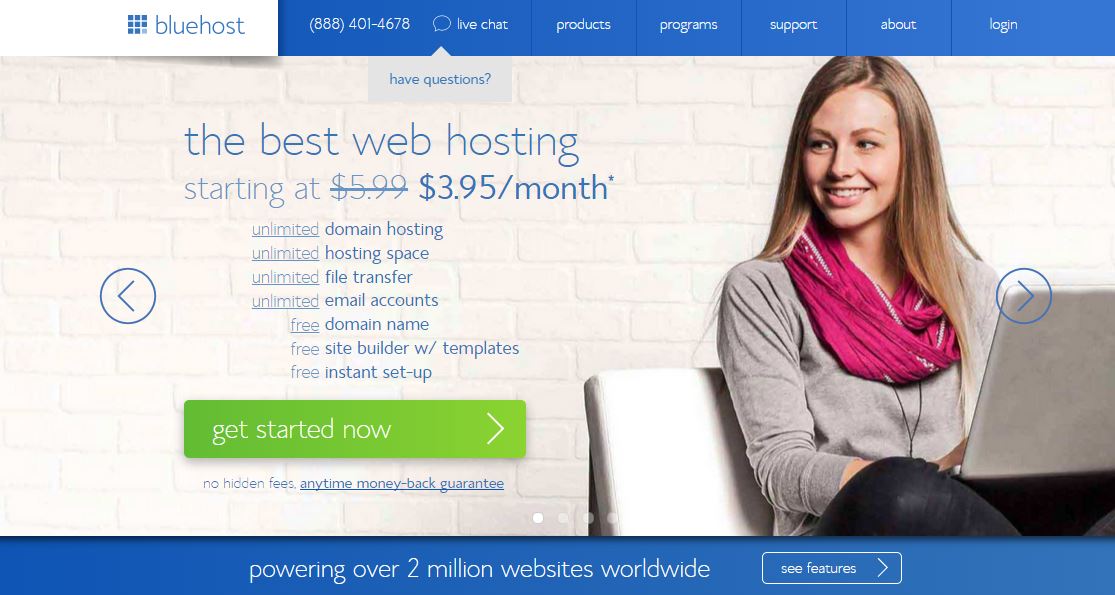
To get started, Click Here to be taken to the Bluehost sign-up page and click “Get Started Now”
Step 2. – Select your Plan
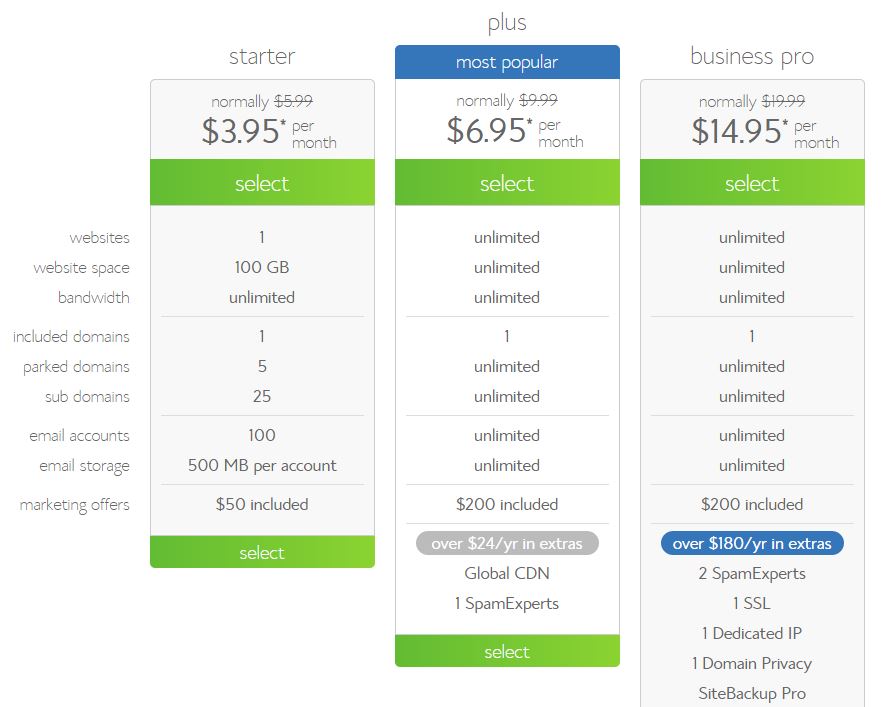
Bluehost offer different priced plans to suit your requirements and budget. Remember you get what you pay for.
Starter Plan – Basic Shared Hosting account, great for the beginner, but you can only have one domain
Plus Plan – Basic Shared Hosting with unlimited options to give you more flexibility if you want to host more than one domain
Business Pro – A Higher Performance shared hosting account that has a few extras thrown in
Go ahead and select a plan to suit your needs, and although you can always upgrade later, you won’t don’t get the introductory price discounts.
Step 3. – Choosing a Domain
Next, you need to choose a domain name for your blog. Go ahead and find that perfect blog name by entering your desired name in the left hand dialog box, I’ll wait. Then click ‘next’
** Bluehost provides the first years domain registration as a bonus of being a first time user of their service.
Alternatively, if you already have registered a domain enter that into the dialog box on the right and click ‘next’
 NB: If you already have a registered domain then, you’ll need to contact your registrar and have the nameservers directed to: NS1.BLUEHOST.COM and NS2.BLUEHOST.COM
Step 4. – Account Information
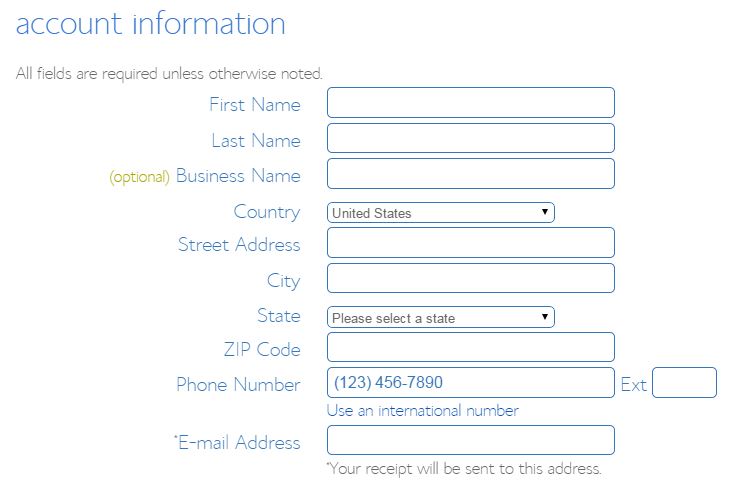
We are in the final stretch, and you are now required to enter your basic account details. Populate this form with your details
Step 5. – Package Information
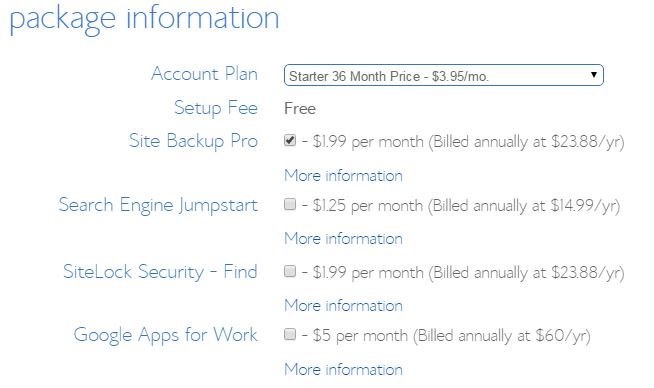
Now you need to decide if you want any extras for your account. I recommend at least selecting the Site Backup Pro, which will enable you to take regular backups of your site. NB: Site Backup Pro is included with the Business Pro offering.
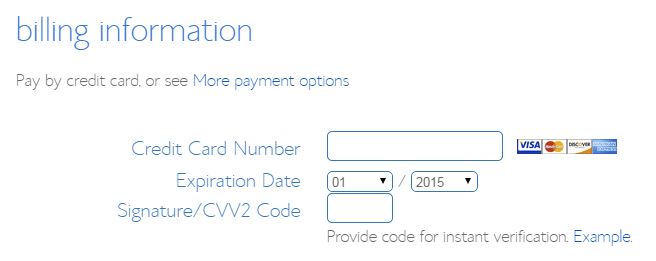
Step 6. – Billing Information
If you are happy with your selections go ahead and enter in you Credit Card Details
NB: For added security always ensure you can see the green https lock in the web address bar before entered your credit card details over the Internet
Step 7. – Terms of Service
When you have finished reading the Terms of Service and relevant policies check the box and click ‘next’
Step 8. – Setting up a Password
If your registration details are in order then you should be taken to a Password setup screen, where you can choose the password you’ll use to access your Bluehost Control Panel. Always use a complex password with letters, numbers and symbols to ensure your password is safe.
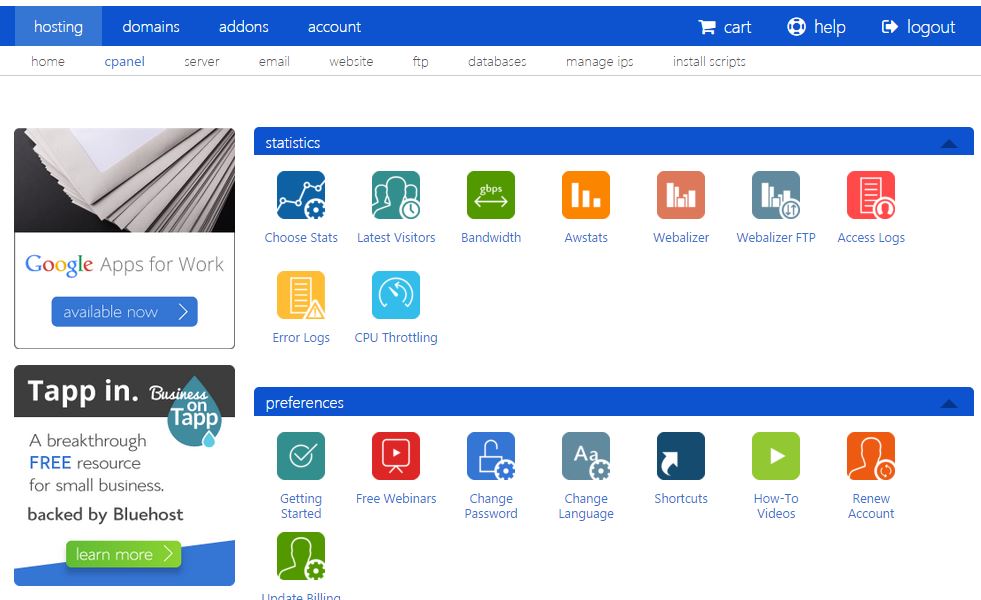
Congratulations! You should now be taken to your Bluehost Control Panel
Step 9. – Installing Packages
Navigate down the page until you find the ‘Install WordPress’ icon under the websites builders tab. Click the icon.
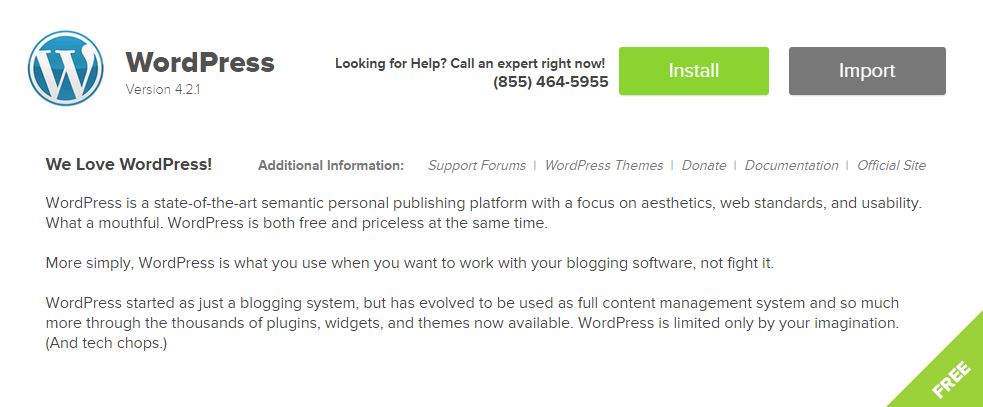
Step 10. – Installing WordPress
Just click on the Install Button, and I’ll take you through the rest of the process. It’s easy and if you’ve got this far, it’ll be a breeze.
Step 11. – Selecting Domain for Installation
Here you should only see your domain and go ahead and click ‘Check Domain’ as the default directory is fine.
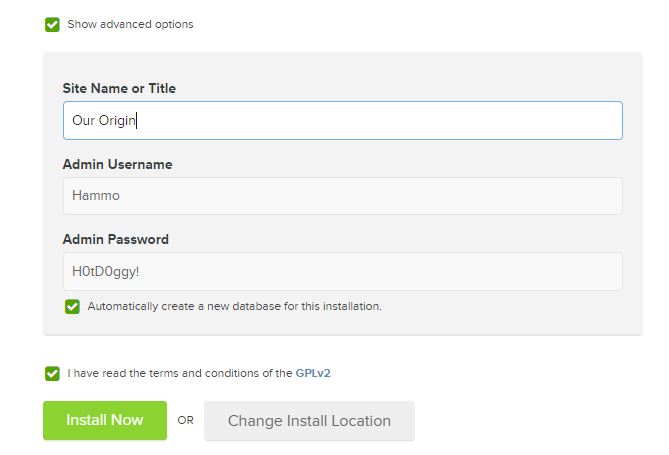
Step 12. – Advanced Options
Click both check boxes to setup your own WordPress login details
Step 13. – WordPress Site Details
Enter in the Name of your Site, a Username (not Admin) and a Password that you’ll use to access the WordPress Site. then click ‘Install Now’
Step 14. – Wait for 15 seconds
Progress Bars now appear at the top of the screen whilst is installing…
And when it finishes you’ll see.
Step 15. – Navigate to your Domain
Now open up a new browser window and enter in your domain name to check out your new site
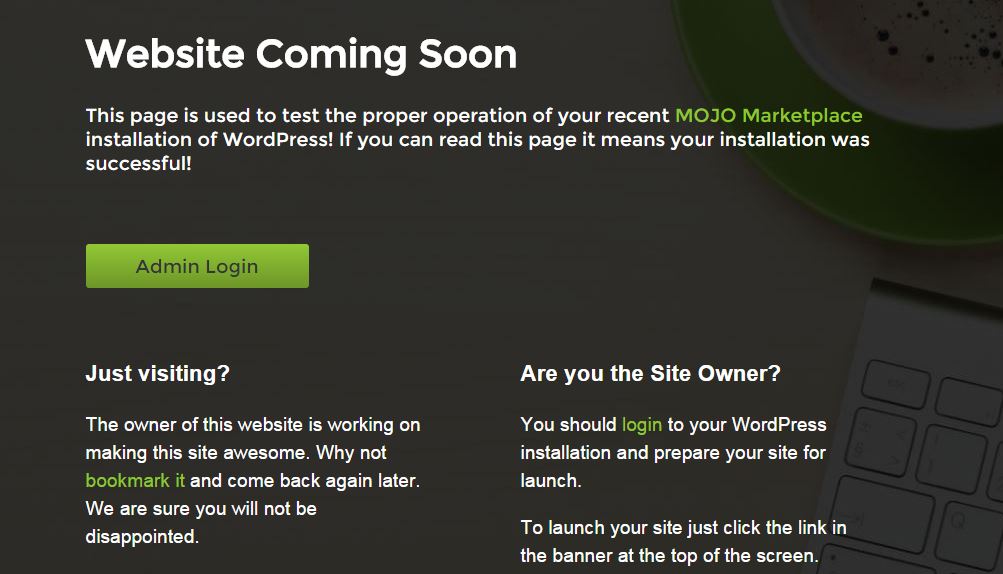
If you see this message click on the ‘Admin Login’ button
Step 16 – Congratulations you are Finished!
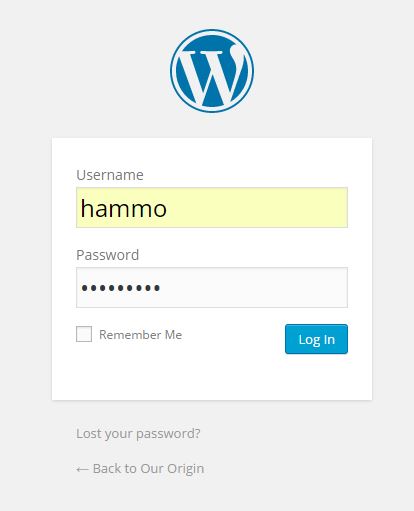
Now, log into your new site using the details you supplied in step 13.
NB: Note the URL for the admin panel is your domain name + /wp-login.php
For example – http://www.ourorigin.com/wp-login.php
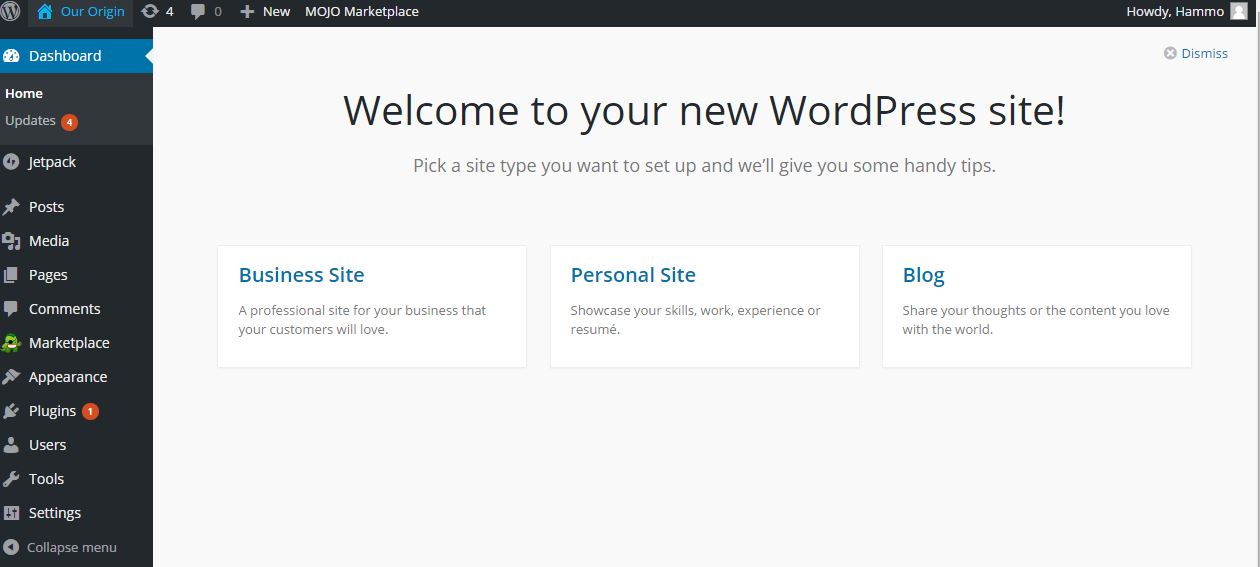
Once inside you will see the standard WordPress Admin Panel.
Stay tuned as I’m currently building more instructions to guide you through the basic WordPress Interface. Sign up to my newsletter if you’d like to be notified when it’s available.
Keep Me informedThanks for getting this far and hopefully I saved you a few dollars in potential set-up costs. If there is something that you’d like me to cover then please do not hesitate to reach out to me.
If this WordPress Installation instructions were useful then please like, it means a lot to me.
Share the post "16 Easy Steps to Start a Blog quickly with Bluehost"

